
So, with Valentine’s day just around the corner, I know there are about twelve-billion DIY craft ideas careening your way, so I won’t try and convince you that this is THE ONE, THE ONLY Valentine craft for you. But if you want to do something fast, frugal, flexible (easy to tailor to any age or skill level), and freaking fabulous, then you should check this out.
Crafts For 8 Year Old Boys
The idea for this craft evolved out of an opportunity I had to plan a DIY craft for the cub scout den that my husband and I volunteer with in our city. It is always a challenge for me to find a fun activity for 8-9 year-old boys that will last an entire hour. If you have never been faced with such a challenge, believe me when I say that a single hour is an extraordinary amount of time to fill when seeking to keep the attention of ten hyperactive boys.
So with high hopes, I decided to try a little string art, inspired by many a pin on my pinterest crafties board, and luckily, it went over as a huge success. I later decided to create my own version at home, so my pictures/how to show my version, but I’ll give you a look at the awesome creativity of our scouts too!
Here’s the lowdown on how we created Valentine’s Day Heart String Art and how you can easily create your own creative masterpiece.
Supplies:
1/2” thick plywood from Home Depot, cut into 12” squares
A box of 7/8” long nails with large heads
2 skeins of yarn
Super simple, right? The lovely workers at Home Depot cut a 48”x48” plywood board into 16 squares for me – which fits into the FAST category for this craft, and the total amount of money I spent on the supplies was $13.84. Less than a dollar per board = FRUGAL (and pretty fabulous).

Here are the 5 simple steps:
1. Paint the board desired color, let dry
2. While paint dries, create heart template with paper
3. Place heart template on board, and hold in place. Use a pencil to draw small dots evenly around the outside of the heart, marking the placement of your nails. Make sure there is a dot at the bottom point of the heart, as well as one at the top center. *
4. Remove the template, and on a hard surface (preferably concrete) pound in your nails.**
5. Grab your yard, cut a long piece off, tie one end to one of your nails and GO CRAZY! Discover patterns and designs by looping the yarn back and forth from nail to nail. Add layers of yarn of the same or different colors until you have created something you love.***

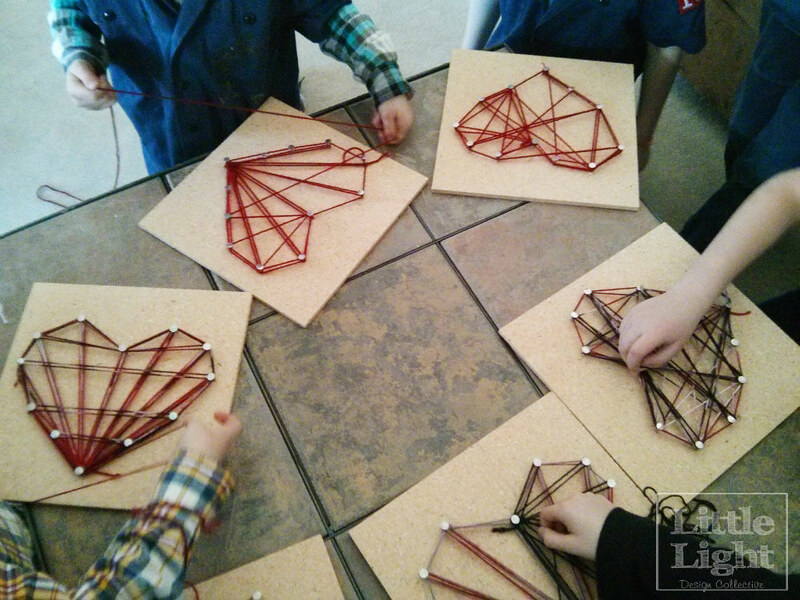
Such a fast craft, but really so much fun and so fabulous for some Valentine décor. Also a very FLEXIBLE craft to fit any age group or skill level. For the cub scouts, we didn’t even paint the boards, and my husband and I hammered in most of the nails for them, leaving the fun, artsy part for them to complete. The boys loved it, and had a great time adding layers of yarn until they were satisfied their hearts were worthy to take home. Here they are in action as they made them. Aren’t they awesome!?!! I should have taken individual pics when they were done, because they did such a fantastic job!
My board was a little fancier, but still fast, frugal and fab – not to mention fun! (I made mine to match these LOVE letters I made a couple years ago, and I love the two together!)

I can totally see this done at a craft night – you could get all sorts of fancy and buy wood with a beautiful grain, or gorgeous stain. Using ribbon or a twine could also give this a more sophisticated look.
So, as Valentine craft idea number twelve-billion-and-one is off and on it’s way, may it inspire some fun DIYing this holiday!
Tips:
*I used 12 dots/nails for the scout boards, for a simpler craft, and 24 for my own, to make it a little more fancy. **I recommend hammering the nails in on concrete because it’s easy to accidentally drive a nail all the way through 1/2” thick plywood. The concrete will stop the nail before it goes too far, however, and then you won’t risk damaging your table or floor. ***I used regular yarn with the scouts, which was perfect, because if they made a design they didn’t like, it was super easy to undo and re-start. I used a thin plastic “yarn” for mine, which bends and stretches, so it’s not so great for re-do’s.
- Pocket Change: Pre-New Years Resolution Survey - December 12, 2014
- Pocket Change – How to Live a Life With No Regret - October 31, 2014
- Pocket Change: To Ti-hui, and Why it’s Important - June 9, 2014
- Introducing Pocket Change - May 19, 2014
- Meet MercoBox - April 14, 2014
- DIY Designer Easter Dress - March 26, 2014
- Valentine’s Day Heart String Art - February 10, 2014

I love this idea! I like crafts where the kids don’t need much guidance and they can really do their thing.
I love this! It’s so cute and festive! I still haven’t done any string art, I want to but I was stuck on thinking I had to have very specific materials so I never bought them. I think I have what I need here at the house to go do one. Thanks!
Would like to do this with my kids. What age would you recommend this for?
I think it would work for any kid over 3. As long as they are not nailing anything, anyone could string some yarn around the nails!